The Best Ways on How to Take a Passport Photo at Home
Are you looking for the best ways on how to take a passport photo at home? Then you are on the right page. Anything is possible on your phone by which taking a passport photo at home is no longer a nuisance.
Next, we will show you four convenient and compliant ways to produce better-than-expected passport photos at home.

To take your own passport photo:
Step 1: Identify the type of photo you use
Step 2: Locate a suitable setting in 3 minutes
Step 3: Take your own passport photo
Step 4: Edit your photo and print it out
Whether you are anxious about taking a passport photo for lack of time to a photo studio, our app will dispel your anxiety after you make convenient clicks to create a passport photo at home complying with official regulations in 3 minutes.
Step 1: Identify the type of photo you use
Different from traditional photography in a photo studio, such as a documentary portrait, the US passport photo you take at home belongs to the practical portrait.
After gaining the basic knowledge of the type of passport photo, you should know what kind of essential elements contribute to a self-made passport photo compliant with stipulated requirements.
Here’s a column presenting some real-life knacks to recognize the right and wrong deeds for a passport photo.
| Requirement | Right | Wrong |
| Photo resolution | Submit an up-to-date and high-resolution photochrome taken within half a year with facial features clearly seen | Choose a low-resolution photochrome taken for years with facial features blurred |
| Head dimension | Keep head between 1-1 3/8. inches in a photo of 2×2 inches from the bottom of the chin to the top of the head | Make your head occupy 80-90 percent of the whole photo |
| Clothing and Adornment | Put on everyday clothes and avoid outfits having the same color as the wall. Wear no or light makeup | Wear glasses and hats or head coverings unless for religious or medical reasons (with signed statement) and wear white or light-color clothing and heavily powdered face |
| Editing | Allow no extra changes to photos including skin whitening, face slimming and eye largening | Make blemish removal and contrast changes |
| Background | Select white or off-white background with a clean and smooth surface | Choose a bright-colored background with a dirty and uneven texture |
| Photo format | JPEG for online application and matte or glossy photo quality paper for on-site applications | Print PDT or other photo formats |
Step 2: Locate a suitable setting in 3 minutes
After following the instructions above, you should find an area at home for taking a passport photo. This is a key step to shape your passport photo complying with the state’s requirements.
First, find a well-lit area around a window and stand in front of the window 1 or 1.5 meters away from the wall.
Moreover, select a clean and tidy background and avoid the wall with dirt and other unnecessary items, such as posters and ornaments.
If you feel hard to find a plain wall, just set your mind at ease, our app is equipped with many functions to help you clear the background and remove unwanted sundries. And many experts are available in our app providing you professional verification of your passport photo for compliance.
Meanwhile, choose a shadowless background in case it would affect the whole image and lead to the failure of verification.
You may like to check out how to Make Your Travel Photos Standout with Professional Editing.
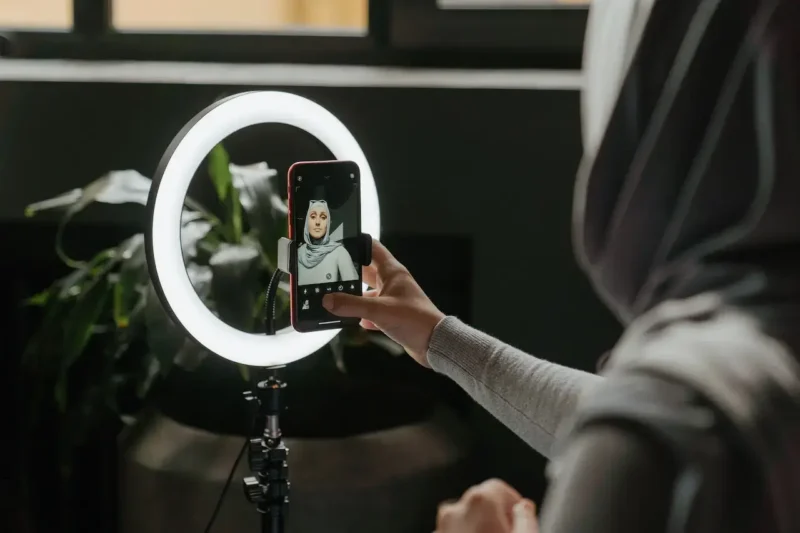
Step 3: Take your own passport photo
With essential preparations finalized, you are greeted with the time to snap your passport photo.
You need to closely follow the official regulations regarding facial expressions (i.e., a neutral expression or slight close-mouthed smile )
In addition, sit or stand straight with your arms relaxed and face looking directly.
Step 4: Edit your photo and print it out
Now, here comes the finishing touch for creating your own passport photo.
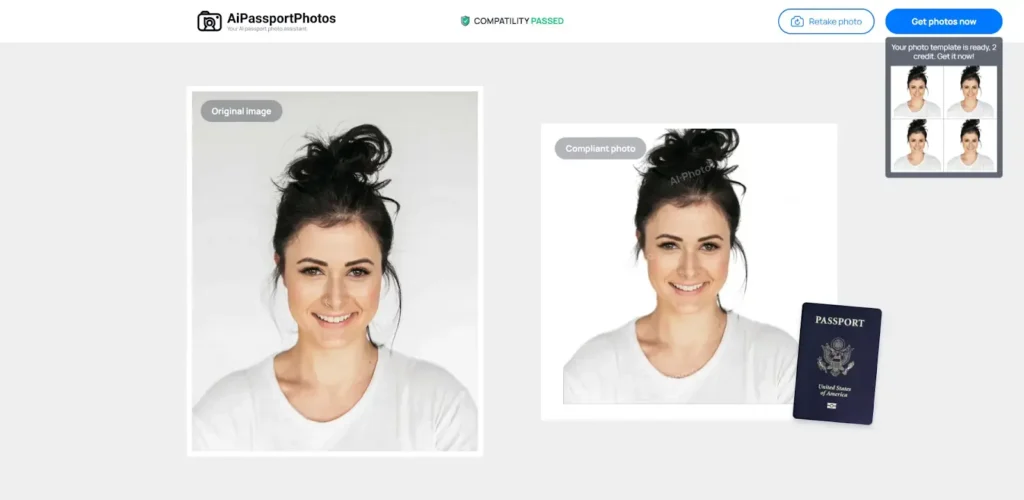
Editing is an indispensable part of the whole process of creating your self-made passport photo and it plays a decisive role in determining whether you will produce a “masterpiece” in compliance with US passport photo regulations.
There is a variety of editing tools for taking homemade passport photos. However, a few of them do not offer background removal or a compliance check.
Among various editing tools, our app, AiPassportPhotos, embraces all editing and verification procedures and can provide a digital photo for US online passport renewals.
Here are some photo editing tools and common adjustments needed to ensure compliance with US passport photo regulations.
Photo editing tools for homemade passport photos
| Adobe Photoshop | It mainly deals with digital images composed of pixels. With its numerous editing and drawing tools, you can effectively edit and create pictures. |
| AiPassportPhotos | It is a multifunctional photo processing tool and can help users process high-quality images faster. In just a few clicks, you can upload your picture, and our AI technology will instantly crop and adjust it to meet the required standards. No more waiting in lines or scheduling appointments – obtain your passport photos at any time, day or night, with the utmost ease. |
| Canva | It offers a wide range of images, original illustrations and high-quality design templates. Users can select their favorite templates and other designs within minutes |
Common editing adjustments
What adjustments are included to make your “masterpiece” a success?
Here are some common editing adjustments you may need to produce your homemade passport photo:
| Background removal | If your background is stained by dirts or filled with items, you will need to remove it and put a plain white background in their place. |
| Brightness and contrast | These adjustments could increase the radiance and rebalance the hues |
| Color correction | It will improve the quality of the photo to make colours more natural |
| Cropping | You need to cut off your passport photo to meet 2×2 inch size requirements |
After using these editing tools and making extra changes to the passport photo, you can ensure that your passport photo is useable and valid according to the state’s official regulations.
Printing
Printing is the final step that will conclude the whole process of your creation. You can use a home printer or a commercial service such as Walmart, CVS, or Walgreens.
If you want to print at home, you should ensure that you acquire basic insights about the printer and its related tools.
| Use a high-quality printer | It refers to a printer with a resolution of at least 600 dpi |
| Print on photo paper | Use photo-quality paper with either a matte or glossy finish |
| Find a passport photo template | Use an online passport photo template that ensures your photos are the right size. |
How to choose the best printer for your passport photos?
Before you buy, be sure to know your needs. For example, is there only a need for printing, or is there also a need for copying and scanning? Generally speaking, printers can be divided into two types, normal printers and all-in-one printers.
Normal printers are mainly used for printing., while the multi-functional all-in-one printers will be more comprehensive in terms of functions, not only supporting printing but also supporting copying and scanning functions. Daily scanning of ID cards or photocopying documents would be more convenient.
Can I take my own passport photo with my phone?
Yes, you can. Any phone equipped with at least a 2-megapixel camera is capable of snapping a passport photo of sufficient quality.
Use your smartphone’s camera with Passport Photo Online’s intuitive application to create US passport photos that are guaranteed to comply with all governmental regulations.